
Step by Step Guide to Reposing Knight Titan Legs
This weekend I put a bit of work into my second Knight Titan, specifically, reposing it's legs! This wasn't as hard as I thought, and I did a couple of time/energy saving tricks.
Step 1
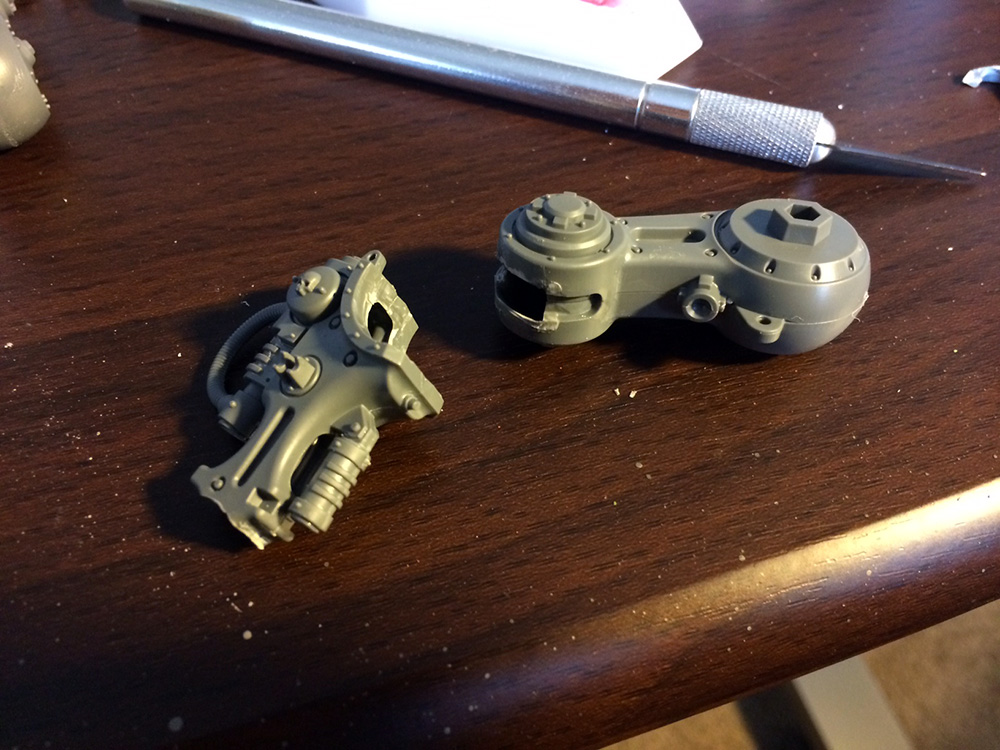
First, separate the legs by carefully cutting along the curve of the joint, where the top and bottom half of the legs meet. Also, cut off the foreward and back pistons, keeping the pieces for later.
 Step 2
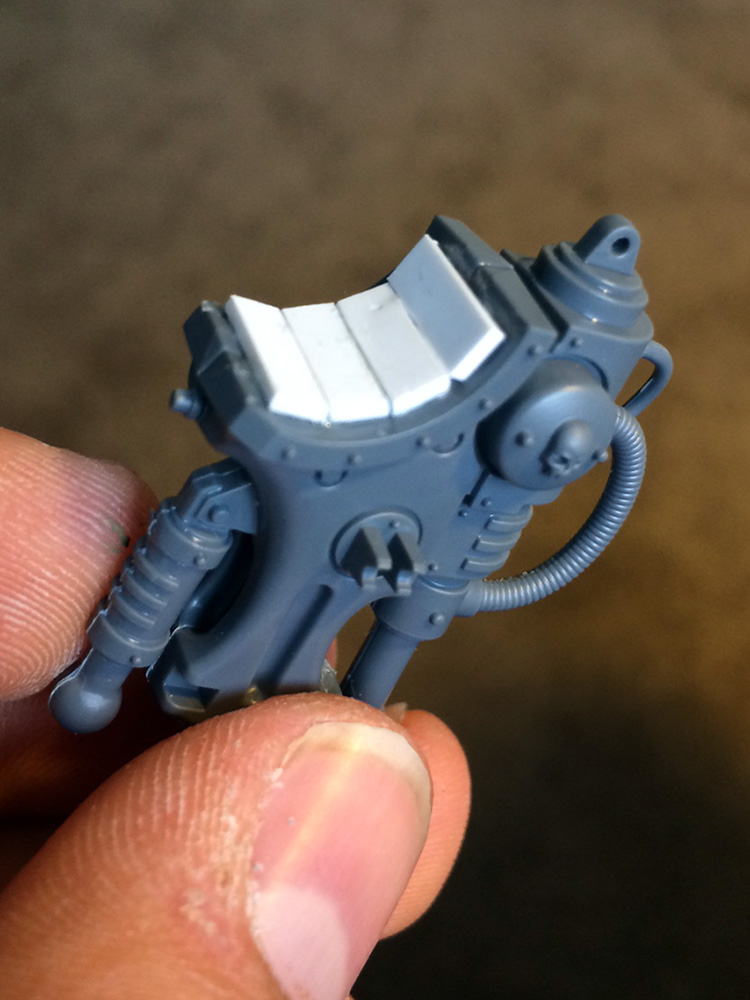
Rebuild the spacer on the bottom half with a bit of plasticard. I also used a touch of bondo to smooth them out on the sides, though odds are, nobody will see this area.
Step 3
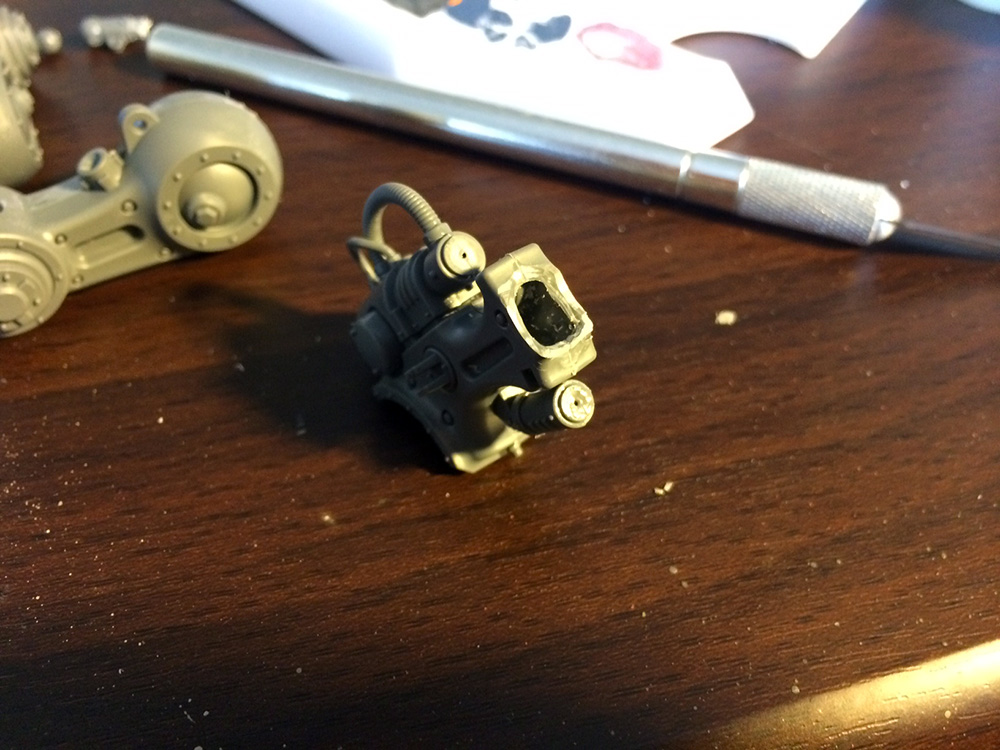
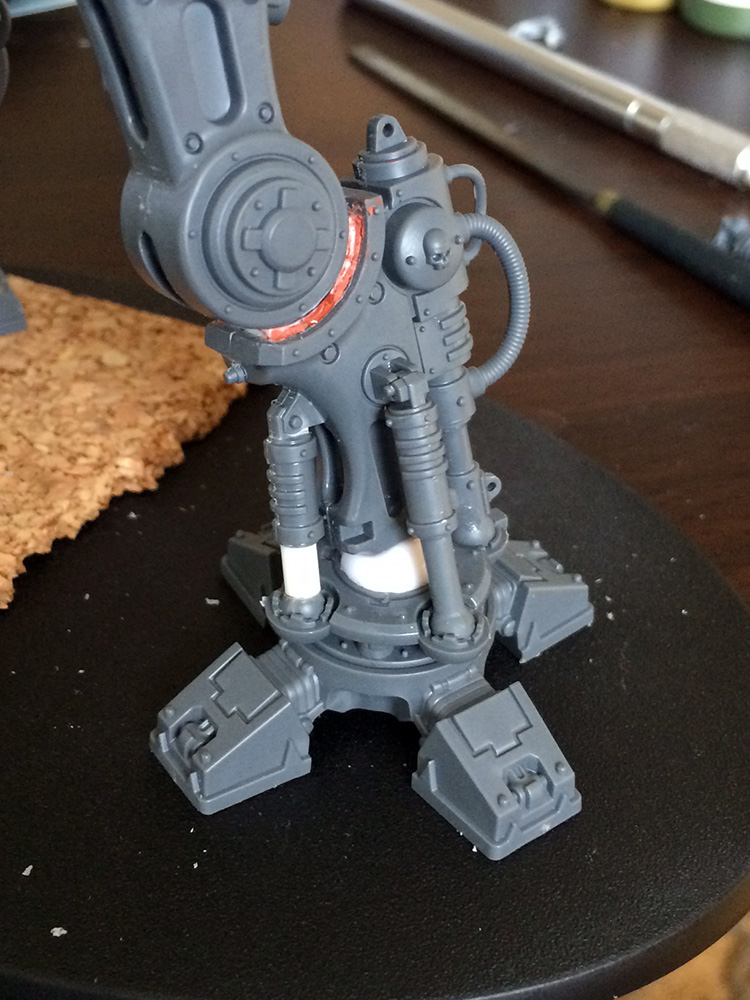
Carve out the half ball socket in the bottom of the leg, do this by making it create a bit of a cup shape inside the leg itself. This will allow it to fit comfortably on the new ball socket we'll make.
 Step 4
To recreate the ball socket, I bought some 12mm plastic beads and cut them in half. Since I knew it was impossible to cut them in half perfectly down the center, I used the smaller side of each bead I cut. After cutting it, glue it onto the top of the foot.
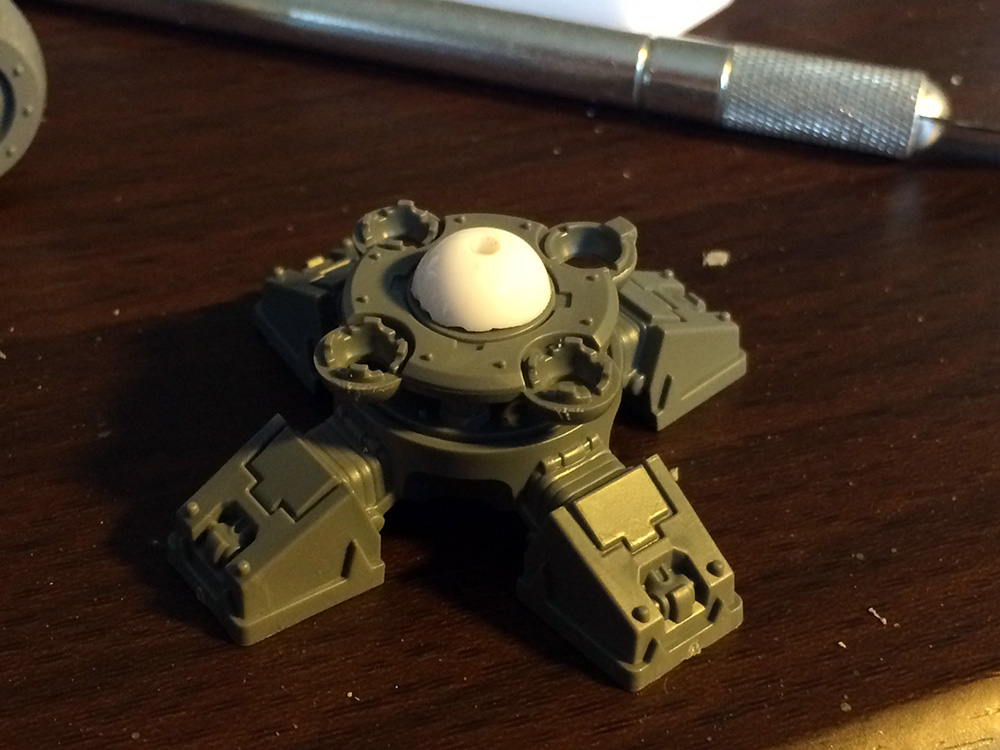 The shin part of the leg should be able to fit on top of this and move around freely.

Step 5
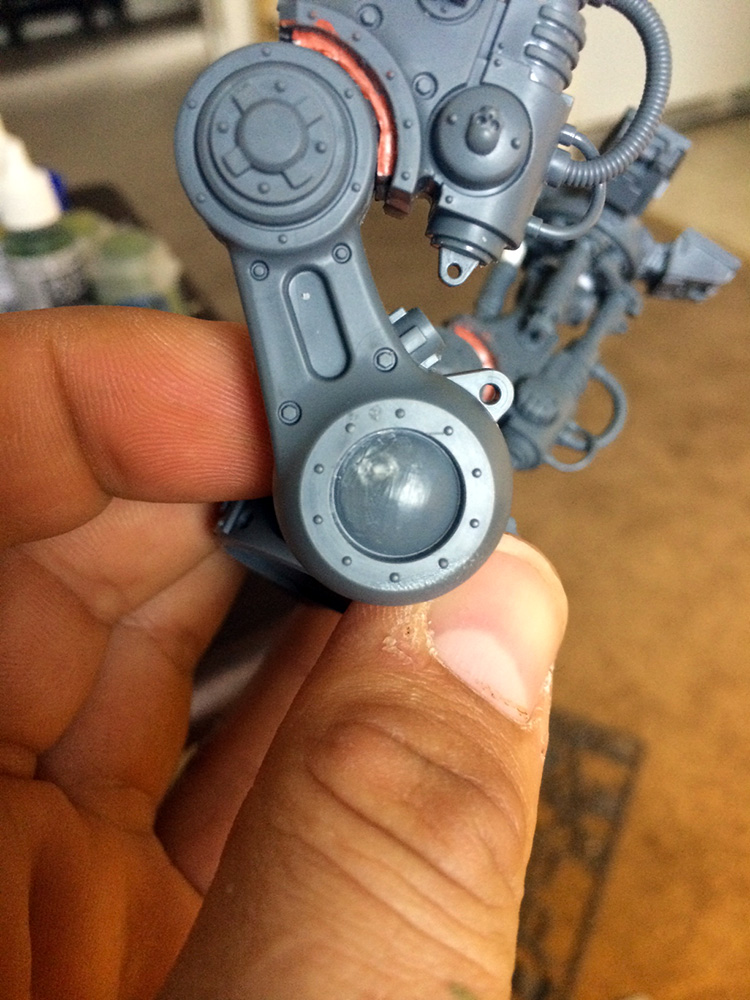
By cutting new lengths of plasticard rod, replace the lengths on the existing support pistons. I made sure to save the ball joints from the original so that they'd fit perfectly in place.
 To save a little bit of time, I actually kept the legs at a fairly similar angle to the body as before, this meant that the side to side pistons didn't need to change length, just the front and back ones. For the back one in this picture, I was able to just cut the existing piston short instead of having to replace the whole thing, but it's all the same principle.
Step 6
If you're feeling extra ambitious, greenstuff mold the axle bolt at the end of the ball socket at the top of the leg, then shave it off. After you position the legs, you can mold some new bolts and make sure they're in the correct location.

 Step 7
Now do it again!
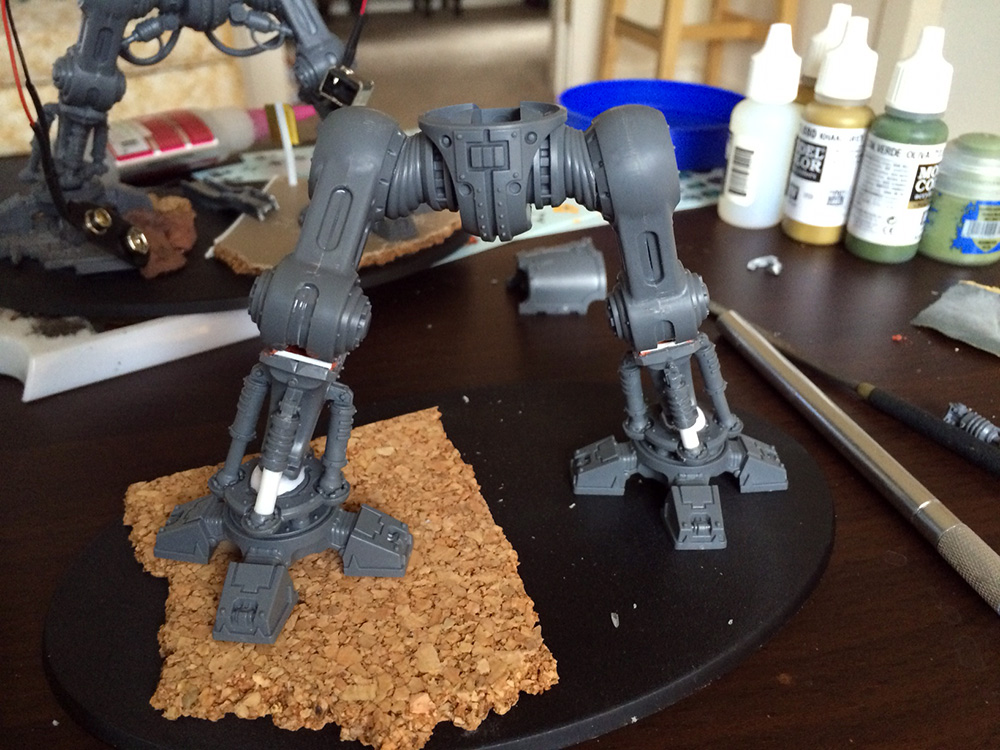 You can see in this picture that the leg on the right (it's left) had the casing of the leg joint sawn off a bit, this was just to bring the leg angle down a bit to compensate for the other leg stepping upward.
Finished Product
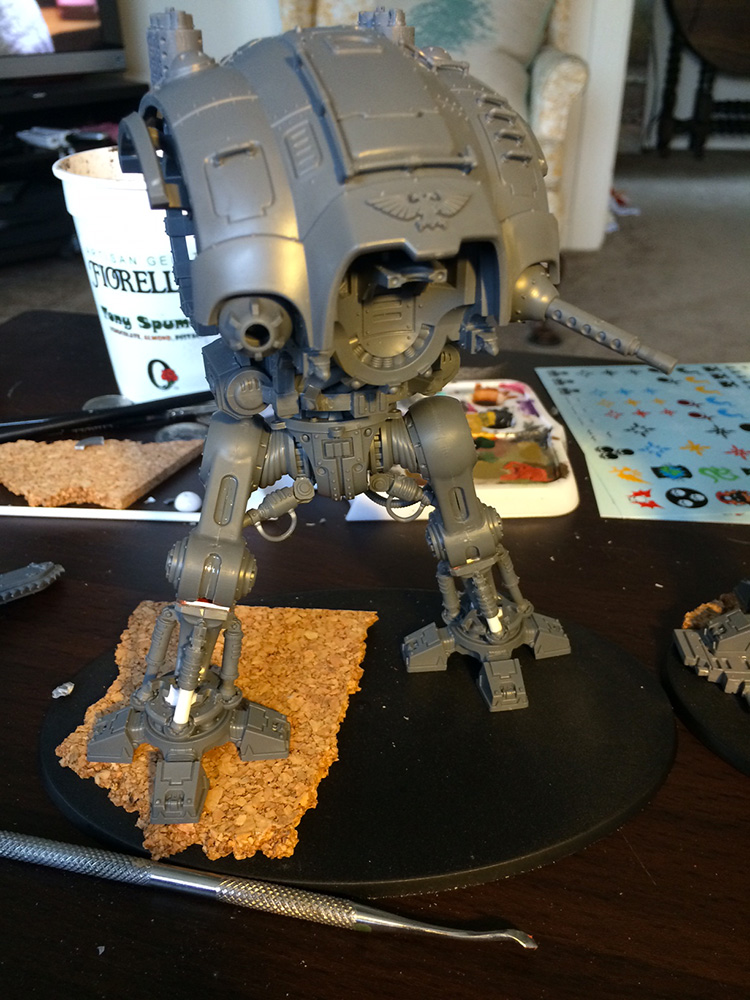 Now you can see the monster stepping up onto the piece of cork, mission accomplished!
