
Chaos Marines vs Tau, 1750 The Relic

Last thursday saw my first game against the new Tau book. I always was worried about how much firepower could be brought to bare against my army, so this was going to be a real test. Since I'm still building my second Trukk, I brought a list that is a hybrid of my usual Abaddon list, and a faster list with Ork allies.
Abaddon the Despoiler
10 Chaos Marines: 2 Plasma Guns, in Rhino with Havoc Launcher 10 Chaos Marines: 2 Plasma Guns 16 Chaos Cultists
Heldrake: Baleflamer Heldrake: Baleflamer
Maulerfiend: Lasher Tendrils Maulerfiend: Lasher Tendrils Maulerfiend: Magma Cutter
Ork Warboss: Power Klaw, Shoota, Attack Squig, Bosspole, 'eavy Armour
11 Ork Boyz: Nob with Power Klaw, in Trukk 10 Gretchin: Runtherd
My Tau opponent was playing with his old army, though modified a bit to fit the new edition. He didn't have any Riptides or Broadsides yet, but that doesn't mean his list wasn't deadly.
Tau Commander: Twin-linked Fusion Blaster, Plasma Rifle, Neuroweb Jammer, Puretide Engram Chip, Iridium Armour, Stimulant Injector
3 Stealth Team: Shas'vre with Drone Controller, Marker Drone 3 Crisis Team: 2x Missile Pods, Velocity Trackers 3 Crisis Team: Twin-linked Plasma Rifles and Missile Pods
12 Fire Warriors: Pulse Rifles in Devilfish with Disruption pod, Blacksun Filter and Gun Drones 12 Fire Warriors: Pulse Rifles in Devilfish with Disruption pod, Seeker Missile, Blacksun Filter and Gun Drones 20 Kroot: Sniper Rounds
7 Pathfinders 7 Pathfinders
Hammerhead: Blacksun Filter, Disruption Pod, Submunitions, Twin-linked Smart Missile System Hammerhead: Blacksun Filter, Disruption Pod, Submunitions, Twin-linked Smart Missile System
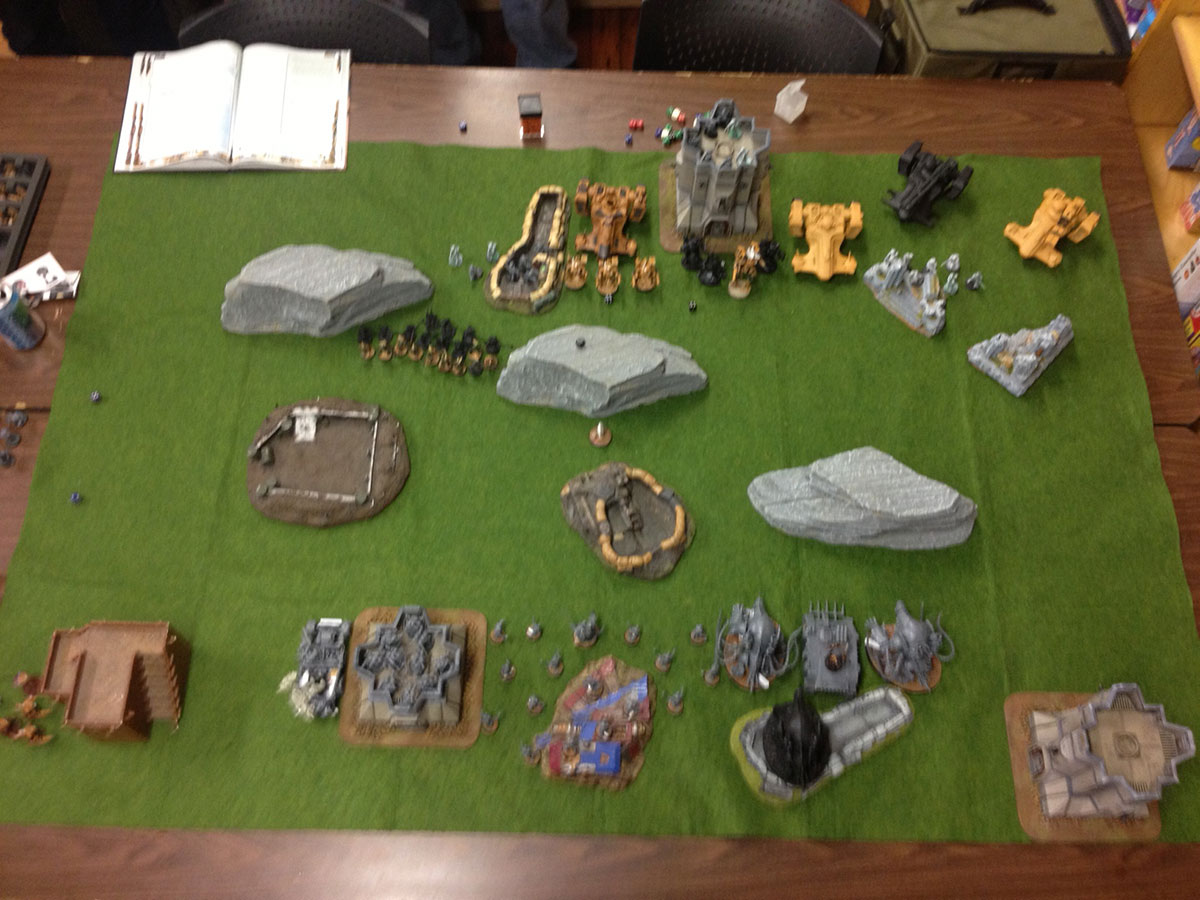
Setup and Deployment
We rolled The Relic as our objective with Dawn of War Deployment. My opponent, Alex, won the roll to deploy first and go first, setting up fairly centrally with a majority of his forces and with his Hammerheads on my right. I also deployed fairly centrally, but with my Maulerfiends on my right, hoping to have them charge in and kill the Hammerheads before they can cause too much damage. Alex then infiltrated his stealth team fairly close to my Orks, probably trying to stop them in their paper armoured truck before they can get into his lines... Unfortunately for them, I seized the initiative.
Turn 1
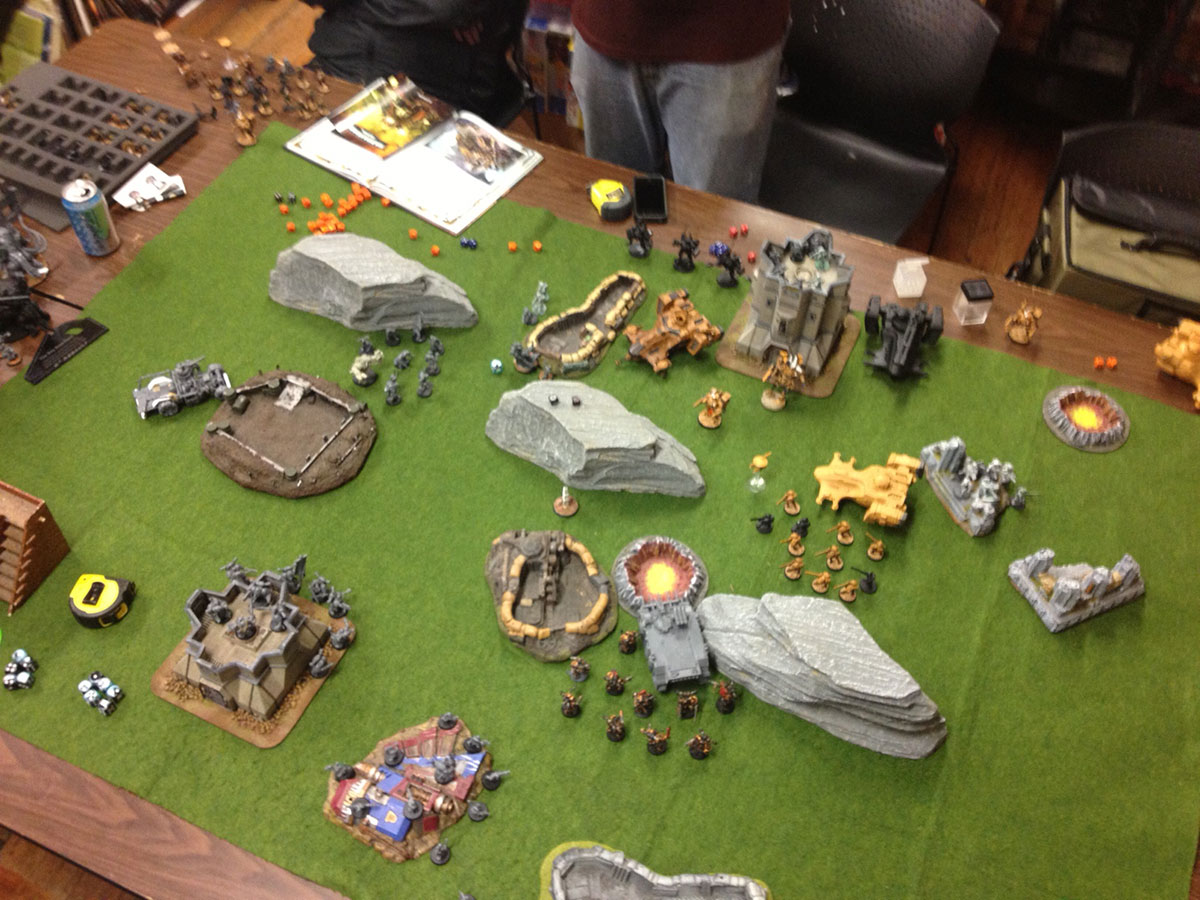
With me going first, I had the advantage of being able to handle those stealth suits before they could really ruin my plans. The Ork Warboss and friends moved in their Trukk close to the Stealth Suits, hopped out and proceeded to turn their little blue bits inside out. First Blood to Chaos! The rest of my turn involved running the rest of my army up the field as quickly as possible.

Despite losing the Stealth Team, Alex's first turn was quite a bit more productive. Seeing my lack of firepower, he detached his Commander, hoping to kill off the midfield Maulerfiend, though after missing with this plasma shots, his Melta only caused a Crew Shakened result. Seeing that the Commander needed assistance, the first Hammerhead took aim and annihilated the Maulerfiend with it's mighty Rail Cannon. The Mauler I had in front, leading the charge on the right, got lit up with 4 Markerlights, followed by being focus fired by the Missile Pod suits, then finished off by the Fire Knives. By the end of Turn 1, I've already lost 2 of my Maulerfiends... That wasn't what I wanted at all!

Turn 2
One of my Drakes came in this turn, flying forward and putting a couple wounds on the Fire Knife suits. My last Maulerfiend successfully charged the Hammerhead, tearing it to shreds. Abaddon charges into the Kroot with his cultists, suffering a wound from Overwatch in the process, then he proceeded to kill 8 of the ugly brutes himself. The Kroot ran, but I couldn't sweep.
Alex didn't like the idea of a Heldrake floating around, so he did what any good Tau player would. He fired all of his markerlights at it, boosting his Missile suits to BS5, and then unceremoniously shot it out of the sky. As if that wasn't enough, the surviving Hammerhead responded to it's buddy getting killed by blasting the last Maulerfiend to smithereens. For those keeping track, I have now lost all 3 Maulerfiends and 1 of my Heldrakes, and it's only turn 2!

Turn 3
Perhaps put off by watching all this daemon forged brethren get blasted apart, my last heldrake decided not to come on the board this turn. My Orks, who were finally back to part of the board where they can take place in the game, charged into the Kroot, wiping them out without much resistance.
The Tau turn was not that exciting... except for a squad of Firewarriors disembarking from their Devilfish, turning Abaddon and the last cultist into pools of searing goo... Wonderful. Turn 3, no Abaddon, No Maulers, only 1 Drake left. This was definitely a good lesson in the firepower of the Tau.
Turn 4
By the fourth turn, my Heldrake couldn't stay off the board any longer, and decided that now was the time to strike. He flew on torching the fire warriors that so badly hurt Abaddon, while my Chaos Marines charged into the second squad if fire warriors, losing two to overwatch, but wiping out the squad in return. The Ork trukk tried to become relevant again, but immobilized itself trying to drive through some mud. The Tau Crisis Commander again showed off his talents with a plasma rifle by scoring two 1's to hit, and then his fusion blaster failed to wound any of the Chaos Marines.

Turn 5
Things were starting to go my way around Turn 5... The Helldrake caused 4 wounds to the Missile Pod suits, while doing a 5th wound with his Baleflamer. The Ork Trukk shot from across the board killing the 3rd Missile suit, yay! The rhino behind the Chaos Marines was subsequently wrecked, and the Hammerhead plopped a submunition into the Chaos Marines, failing to do any notable damage.

Turn 6
We rolled and the game continued! My marines were able to retreat a bit with The Relic, while my Drake flew off the board, hoping for a turn 7 to do some more damage. At this point, being fairly confident in my victory, I send my Grots off to go fight against the commander and the lone battlesuit. To my surprise, the grots actually kill one, but still lose combat, luckily, they decided to stick around... until the Tau turn, where the commander punched a few more and swept them in combat, doh!

Turn 7
Again, the game decided to continue, though at this point, there isn't much left. The Heldrake flies over the commander dealing a wound, while my Ork Warboss makes a run for it to score Linebreaker. At this point Alex called the game, victory to Chaos!

Conclusion
The early game was extremely rough, losing 3 Maulerfiends, Abaddon and a Helldrake, all by turn 3, really gave me a set back. The orks worked out fantastic for the low investment, and generally, as I expected, anything that got in combat with Tau was going to cause a lot of damage. The Tau firepower was devastating, but without allies, they really struggled to get onto the objective. Overall, it was a really fun game, and makes me look forward to making my Chaos list even faster!
